Best Gluten Free Pizza Crust

A few weeks ago, my mom came into town and we spent a morning making a giant batch of pizza crusts, which we froze in bulk for me to use as needed.  I’m not sure why it never occurred to me to make pizza crust in bulk, but it is such a lifesaver on those nights where you have been running around all day with the kids/work and  you come in thinking that the last thing you want to do is make dinner.   And, since pizza is one of the 5 foods my 4 year old will eat, we tend to make it a lot around here.

This is some seriously good pizza crust folks!  In all honesty, I might even like it better than it’s gluten filled counterpart.   It’s crispy, but still manages to have a nice chew.  It’s light, yet sturdy enough to hold up a generous helping of toppings.  It is without a doubt the best gluten free crust I have tried and I love that the recipe makes such a large batch.

I liked it so much that I’ve already made it through my frozen stash. I needed to carve out a morning to make another recipe so I thought I’d document the process so you can make it at home too! The format for this post will be slightly different as I think that pictures intermixed into the directions are particularly helpful for this recipe. No fancy or colorful pics for this post because really…how colorful can you make a tutorial on pizza crust?  But, stay tuned for a delicious fun pizza recipe to try with this crust in my next post!

Let’s get started shall we?

To begin, you will need to make a basic gluten free flour blend.  Do this by combining 4 cups of sorghum flour and 6 cups of brown rice flour.  This will give you enough flour for several recipes so your leftovers can be stored in a cool dry place or in the fridge for later use.

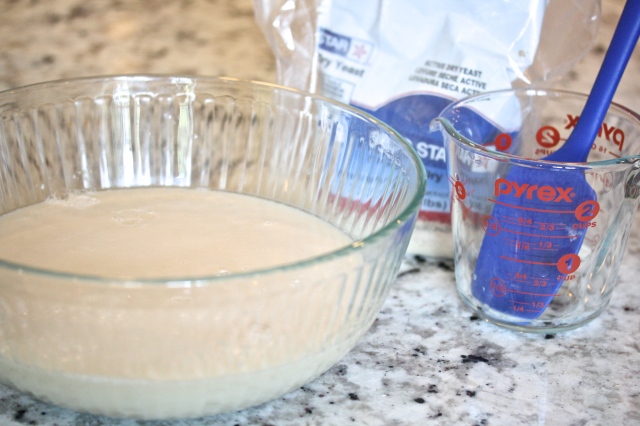
Next, mix 4 Tbsp of dry yeast, 4 Tbsp sugar and 6 cups of warm water in a large bowl.  Let the yeast proof for at least 5 minutes or until it is bubbly and puffed up.

IMG_9254

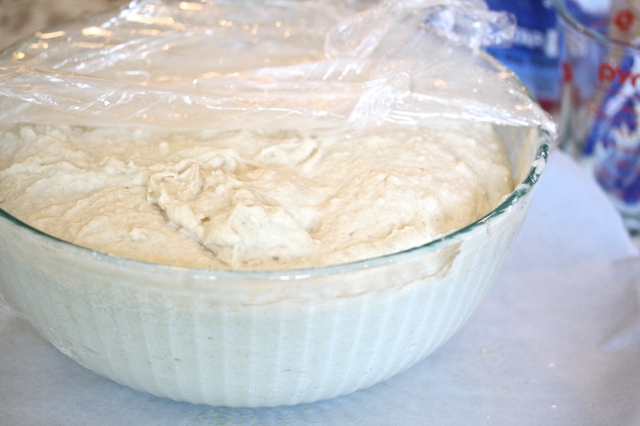
To this mixture, add 4 cups of the flour blend, 4 cups of potato starch, 8tsp xantham gum, and 2 Tbsp salt.  Whisk together until smooth.  Add 8 Tbsp olive oil and mix until combined.  Cover the bowl with plastic wrap and let it rise on top of the oven for 30 minutes.  Do not let it rise for much longer than this because the dough will become harder to work with.

IMG_9256

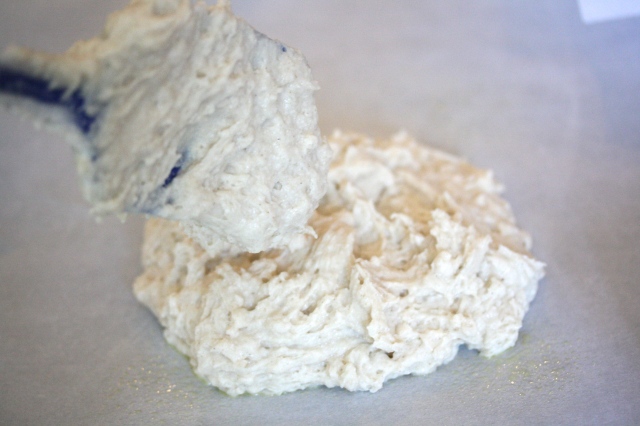
While the dough is rising, take some time to gather your supplies to make the dough into individual crusts.  You will need 3 large dinner plates or pizza pans, a roll of plastic wrap, a roll of parchment paper, a pie/tart pan and cooking spray.  Cover the pie plate with plastic wrap and spray generously with cooking spray.  Place a large piece of parchment paper on your work surface and scoop a generous cup of dough onto the parchment.

IMG_9262

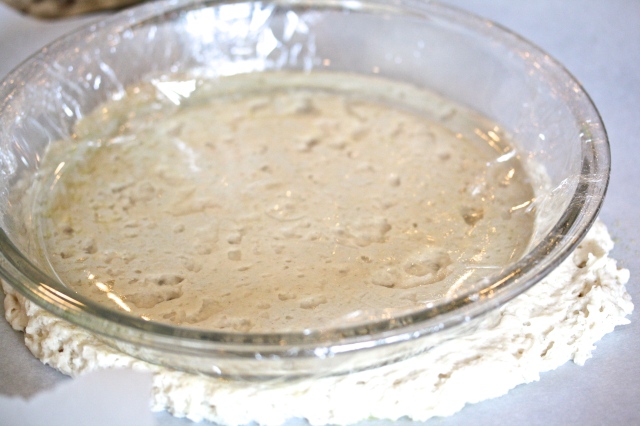
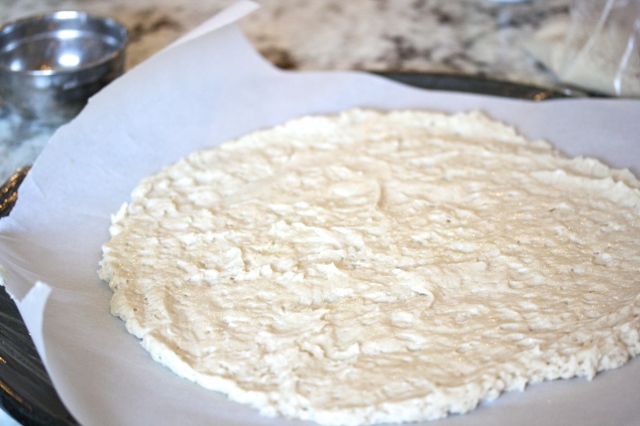
Next, gently press the dough into a circle using the pie plate.  You will want to be careful when lifting the pie plate off the dough so as not to tear it.  Press the dough out so that it is very thin (less than 1/4″ thick) and about 10″-12″ in diameter.

IMG_9259

IMG_9260

Slide the pizza crust and parchment paper onto one of the pizza pans or large plates and place it in the freezer.  Repeat this process two more times.  On the fourth crust, you may begin gently stacking the new crusts on top of your partially frozen crusts.  This recipe makes about 8-9 crusts so once you have finished making all the crusts, allow them to freeze for several hours or overnight until completely hardened.  To store, stack the crusts on top of one another, separated by parchment paper and wrap the entire stack in aluminum foil.  Freeze until ready to use.

To cook the crust, preheat the oven to 450 degrees.  Spray a pizza pan with cooking spray and place the frozen crust on the pan.  Bake on the bottom rack for 20-25 minutes until it begins to brown on the bottom.    At this point you can add your toppings and bake for additional 15 minutes until the cheese is fully melted and slightly browned on top.
How to Make Bright Eyeshadow Wearable

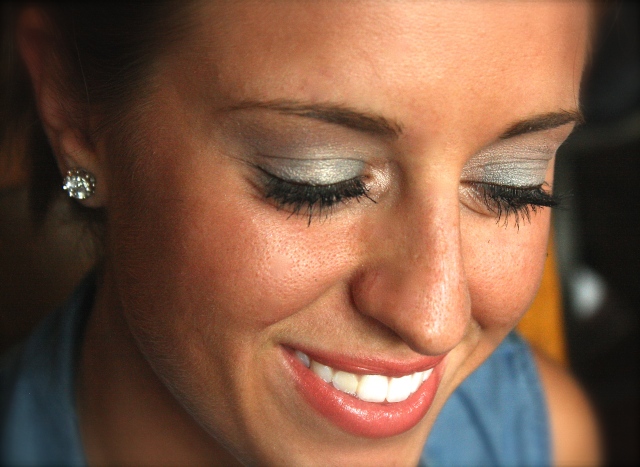
   I am a die hard neutral makeup lover.  Pass me the taupes, bronzes and champagne colors any day.  But there is something kind of fresh about the occasional pop of color on the lid.   We get scared of bright colors because our mind’s eye automatically transports us to the days of big hair, scrunchies and geometric sweaters.  There is a way, however, to make bright colors totally wearable and even, dare I say it, surprisingly subtle.   I recruited my gorgeous sister in law to be my guinea pig and put this look into action.  While not all of us can have strikingly beautiful big blue eyes, the principles for rocking this look are the same.   Here are the tips that I think make bright eyeshadow modern, fresh and totally wearable!

IMG_9141


IMG_9167

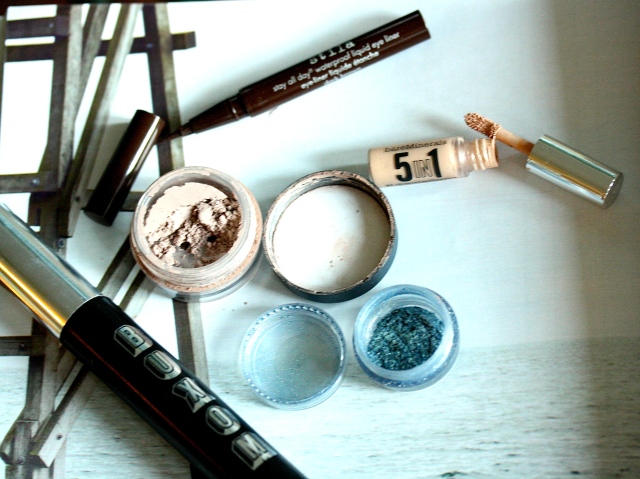
1.  Prime your lids.  This step is crucial if you are going to wear a bright shadow.  You really want the bright color to stay focused on the center of the lid and not migrate up into the crease (a la 1980’s blue eyeshadow disaster).  I used the Bare Minerals 5-in-1 Advance Performance Cream Eyeshadow in Candlelit Peach. 

2. Surround the color with a neutral.  This is the single most important step to a more subtle take on a bright lid.  Choose a light matte shade just a bit darker than your natural skin tone.  Using a fluffy blending brush, sweep the shadow into and slightly above your crease, using wind shield wiper motions.  Add more shadow to build up the intensity in the outer half of the crease.  I used a limited edition shadow but any medium taupe shade would work (similar here).

3. Commit to a bright color.  Choose a color that works with your eyes and skin tone.  I chose a bright blue for Isabel because I thought it looked great against her tan skin and blue eyes.  I used Bare Minerals Eyecolor in Chameleon.  Next, you want to take a flat shadow brush and pack on the color.  Don’t sweep the brush over the lid.  Pat the color on gently, focusing on the center of the lid until you reach your desired intensity.

4. Keep the rest of your makeup simple.  In order to keep this makeup look modern, minimize the rest of your makeup.  Finish your eyes by tight lining the upper lash line and applying mascara.  Try the Stila Stay All Day Liquid Liner in dark brown and your favorite mascara (I think this is totally personal preference).  Keep the rest of your face minimal by simply applying a bit of concealer and finish the look with a soft peach lip.   

5. Be confident because God made you beautiful!

IMG_9142

Parmesan Chicken with Arugula Salad a.k.a Pounded Chicken

My husband is what I like to call a chicken snob.  His definition of a gourmet chicken dinner is what he has dubbed “pounded chicken.”  In other words, the chicken’s edible-ness factor increases by 1000% if I take a meat mallet to it.  I can’t tell you how many times I’ve made a chicken breast dinner […]

[Continue reading...]

Summer Grill Out Series Pt 3- Grilled Hangar Steak with Chimichurri Sauce and Quinoa Salad

  We’ve come to the last installment of our Summer Grill Out Series.  If you missed the first two, head on over to check out this Italian Bean Dip and this Grilled Romaine salad.  For this last installment, I’ve decided on a rich and flavorful main dish that is the perfect summer entertaining meal.   Where […]

[Continue reading...]

Summer Grill Out Series Pt 2- Grilled Romaine Salad

This salad is really the inspiration behind this whole meal in my Summer Grill Out Series.  We have a local restaurant that serves a salad very similar to this and I get it every single time I go, which says a lot since I usually prefer to vary up my menu selections.  The concept of grilling […]

[Continue reading...]

Summer Grill Out Series

  I think one of my favorite things about summer eating is firing up the grill and eating outside.  I love the casual feel of a meal enjoyed outdoors.   My kids can play on their jungle gym while I man the grill, and for some reason, the evening breeze always lures me to linger […]

[Continue reading...]

The Summer Face

I thought I would mix it up a little today and tell you what I’ve been wearing on my face lately.  In the summer, I like to use as few products as possible since the heat and humidity can cause heavier makeup to slide and cake up on your face. This summer, I am totally loving […]

[Continue reading...]

Chocolate Cherry Chunk Cookies

  Well folks, I back from a lengthy hiatus due to this precious little gem that joined our family on April 16th:   Little Ben totally lights up my life and is such a bundle of joy.  Our family praises God for such a precious gift and we are all totally in love.   But, […]

[Continue reading...]

Baby Boy’s Nursery

    Our little man is due in 5 days so I thought it would be fun to post a few pics of the nursery.  I used the same nursery décor for both of my girls so it was fun to mix it up a little bit for a boy.  For the most part, I like […]

[Continue reading...]

Cheesecake Dip, Two Ways

  With Easter just two short weeks away, the Easter brunch/dinner menu planning frenzy is sure to begin for many of us.  I think of Easter as sort of the official launch into spring cooking.  We put the heavy casseroles and hearty stews behind us and welcome in a lighter, more colorful fare.  You may […]

[Continue reading...]