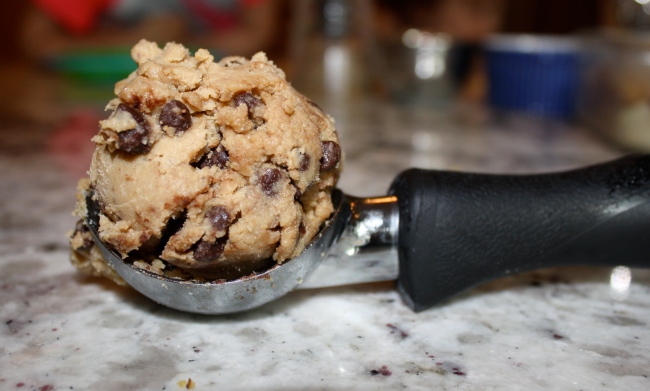
Chocolate Cherry Chunk Cookies

  Well folks, I back from a lengthy hiatus due to this precious little gem that joined our family on April 16th:

Image


Little Ben totally lights up my life and is such a bundle of joy.  Our family praises God for such a precious gift and we are all totally in love.   But, as much as I’d like to think you came to drool over the baby, I’m guessing you’re here for the food.  So let’s talk cookies!

Image

   Now and again I have a craving for a really good cookie.   You know the kind I’m talking about…chewy, moist and loaded with chocolate.  The problem is that most of the cookies I’ve tried that use gluten free flour have been sort of lackluster, dry and grainy.  Little did I know that the secret to a delicious gluten free cookie was not to use flour at all!  Instead, a base of almond meal creates a chewy and totally satisfying morsel of goodness.  I’ve made these cookies twice and my kids loved them.  The second time I made them, we shared them with friends and got equally rave reviews.   And a giant bonus is that they contain no dairy ingredients and are sweetened only lightly with honey.  It’s one of those rare healthy-ish foods that doesn’t taste healthy.  It’s also a flexible recipe and you can adjust the add-ins to your tastes.  These are definite winners in my book!

Image

Image


Chocolate Cherry Chunk Cookies (makes 2 dozen)

Ingredients:

3 cups almond flour, sifted

1 cup dark chocolate chips

1 cup dried cherries

1/4 tsp salt 

1/2 tsp baking soda

1/2 cup honey

1/3 cup cocoa powder

2 Tbsp melted coconut oil

1 tsp vanilla extract

1 egg 

Directions:

Preheat oven to 350 degrees.  Line a baking sheet with parchment paper.  Combine all dry ingredients in a bowl.  Add the chocolate chips and cherries.  In a separate bowl, stir honey, coconut oil and vanilla together (you may need to microwave for just a few seconds in order to get them to liquefy).  Add the egg and whisk until combined.  Stir the wet ingredients into the dry ingredients until thoroughly mixed.  Scoop the cookies into tablespoon size balls and place on a cookie sheet.  Gently flatten them with your hand.  Bake for 15 minutes and cool for at least 5 minutes before enjoying.  


Cheesecake Dip, Two Ways

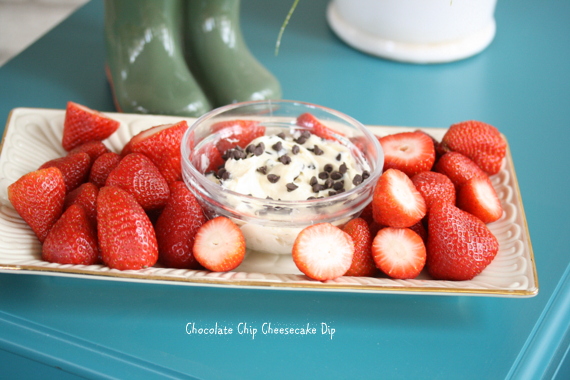
  With Easter just two short weeks away, the Easter brunch/dinner menu planning frenzy is sure to begin for many of us.  I think of Easter as sort of the official launch into spring cooking.  We put the heavy casseroles and hearty stews behind us and welcome in a lighter, more colorful fare.  You may be thinking to yourself that I’ve lost my mind if I’m calling cheesecake dip “light,” but I served it with fresh strawberries, which totally cancels out the calories in the dip, right?  Either way you look at it, I think this would make the perfect addition to your Easter brunch or could even serve as a light dessert for dinner.   I added toasted coconut and coconut extract to mine, but because I knew that many of my readers aren’t huge coconut fans, I threw in a chocolate chip version as well.  This recipe is incredibly flexible so don’t be bound by the ingredients on the page.  In my book, you could almost add whatever you want to cheesecake and it would be delicious.   I paired mine with strawberries, but you could change up the fruits to your liking or serve it with graham crackers.   See, I told you….very flexible, so it can fit into any menu.  Happy Easter menu planning!

Image

Image

Cheesecake Dip, Two Ways

Ingredients:

1 8 oz package cream cheese, softened

1/2 cup butter, softened

3/4 cup gluten free powdered sugar

1 tsp vanilla

2 Tbsp brown sugar

1/2 cup mini chocolate chips, divided (for chocolate chip version)

1/2 cup toasted coconut, divided (for toasted coconut version)

1/4 tsp coconut flavor extract (for toasted coconut version)

Directions:

In an electric mixer, beat together butter and cream cheese until smooth.  Add powdered sugar, brown sugar and vanilla extract and beat on medium high speed until light and fluffy.  If making the chocolate chip version, carefully stir in all but 2 Tbsp of the chocolate chips.  Place in a small serving bowl and sprinkle with remaining chocolate chips.  If making the toasted coconut version, stir in the coconut extract and all but 2 Tbsp of the toasted coconut.  Put in a serving bowl and sprinkle with remaining coconut.   Enjoy with fruit or graham crackers. 

Image  Image


Nutella Chocolate Pudding

I know, I know….it’s been far too long since I put something up on the blog.  I really don’t have a great excuse, but can I make it up to you by giving some chocolate? Doesn’t chocolate always make everything better?   And this is no ordinary chocolate pudding either.   The addition of Nutella kind of takes it over the top, making it the perfect dessert for a special occasion or to share with the people you love most.   I gave some to my sweet little gals and they had smiles on their faces the whole time they were eating, amid exclamations of, “Mmmmmm….choooccolate.”

Image

Now, I know what some of you might be thinking.   Pudding is hard to make.  It’s finicky and time consuming.  Well, I can assure you that this recipe will change how your view homemade pudding because it is so stinkin’ easy.  It comes together with almost no cooking time and yet still has that smooth thick texture of the chocolate pudding that you know and love.   In other words, you can pretty much make this anytime your day needs a little chocolate pick me up.  Sounds like a win, win to me!

Image

Nutella Chocolate Pudding (recipe modified from Cup of Jo)

Ingredients:

2 tbsp cornstarch

1/3 cup cocoa

1/2 cup sugar

1/4 tsp kosher salt

2 cups milk

1/2 cup cream

3/4 cup nutella

2 tbsp unsalted butter

1 tsp vanilla extract

Directions:

In a saucepan warm up milk, cream and sugar until sugar is dissolved and milk has just started to boil.  Meanwhile, mix cocoa, cornstarch and salt in a medium size bowl.  Once the milk mixture is heated, pour half of it into the cocoa mixture and stir with a whisk until combined.  Add this mixture to the remaining milk mixture and whisk quickly to combine.  Bring the mixture to a boil and allow to boil for 2-3 minutes until it has thickened slightly.  Remove from the heat and stir in butter and vanilla extract.  Pour the mixture through a fine mesh sieve and refrigerate for at least three hours.   Serve with berries and whipped cream.


My Holiday Baking List

I kind of procrastinated big time on my holiday baking this year.   Did anyone else feel like December was so short this year?  I kept thinking, “I have plenty of time,” only to realize that Christmas is next week!!!! Consequently, I’ve been in a bit of a baking frenzy this week.  Here are the things that made it onto my baking list this year.  All of these recipes are new to me this year and I have to say, I’ve been very pleased with the the results!

Turtles: I’ve made turtles before, but this year I wanted to make my own caramel that is corn syrup free.  Try this recipe and substitute honey for the corn syrup.  The honey gives the caramel a rich, unique flavor that compliments the caramel flavor perfectly.

Image

Chewy Coconut Truffles:  There are seriously few flavor combinations I like better than coconut and chocolate.  These truffles are delicious.  I followed the recipe, but substituted dark chocolate for the milk chocolate. The coconut filling is sweet, gooey, and moist. The dark chocolate coating takes it over the top, adding a slightly bitter note to compliment the sweetness of the coconut.  I’ve have a hard time resisting these.

ImageImage

Peppermint Patties:  I made these with my husband in mind and they definitely give York Peppermint Patties a run for their money.  Not to mention, they are so pretty and festive.   They make a tasty after-dinner treat or a thoughtful gift to wrap up and give away.

ImageImage


Italian Almond Cookies:  I love that these cookies are naturally gluten free.  They are sweet, nutty and wonderfully chewy.  In my opinion they would be perfect with a cup of English Breakfast Tea.

Image

Hope this gives you a few new ideas for your own holiday baking.  What is on your list this year?

Gluten-free Chocolate Chip Oatmeal Cookies

Sometimes, I feel like I am constantly running from store to store for last minute ingredients that somehow I’ve either forgotten to put on my shopping list or actually looked at on my shopping list 100 times in the store, yet still managed to forget.   My husband thinks it’s particularly funny that often the items I am running out for should be staples in my pantry.  Case in point: the other day I was making dinner for a friend who recently had a baby.  In typical fashion, I didn’t plan ahead for a dessert so on the day of, I pulled up my old standby chocolate chip cookie recipe and started whipping up a  batch. I got about halfway into the recipe and realized I had NO flour. Zip. Zero.  Zilch.   Seriously?!?!?! No flour?!?!?!  I mean, my husband and I are eating gluten free these days, but I usually have some flour around the house for these kinds of occasions.   To make matters even worse, I’d already dragged my kids to the store once that morning for a different ingredient I’d forgotten.  So, I scoured the internet for cookie recipes, hoping for a magic flour free option to appear.    I found a promising recipe for monster cookies that used oats instead of flour.  Since I had already started the other recipe, I just combined them and the results were better than I could expected.  Hearty like an oatmeal cookie should be, crispy on the edges and chewy in the center.   And perhaps best of all, it saved me from another trip to the store.  You know what they say…”necessity is the mother of invention!”

These cookies come together much like your traditional chocolate chip cookie recipe.  Start by creaming your butters and sugars together and then adding eggs and vanilla.  Mix in the dry ingredients until well combined.

Image

Refrigerate the dough for several hours.  This is a very important step in achieving that perfect crispy edge, chewy center texture.  Scoop 12 heaping tablespoons on a greased cookie sheet and bake at 350 degrees for 10-12 minutes.  If you don’t want to bake the whole recipe at once, you can put the leftover dough in plastic wrap, roll it into logs and put it in your freezer for later.

Image

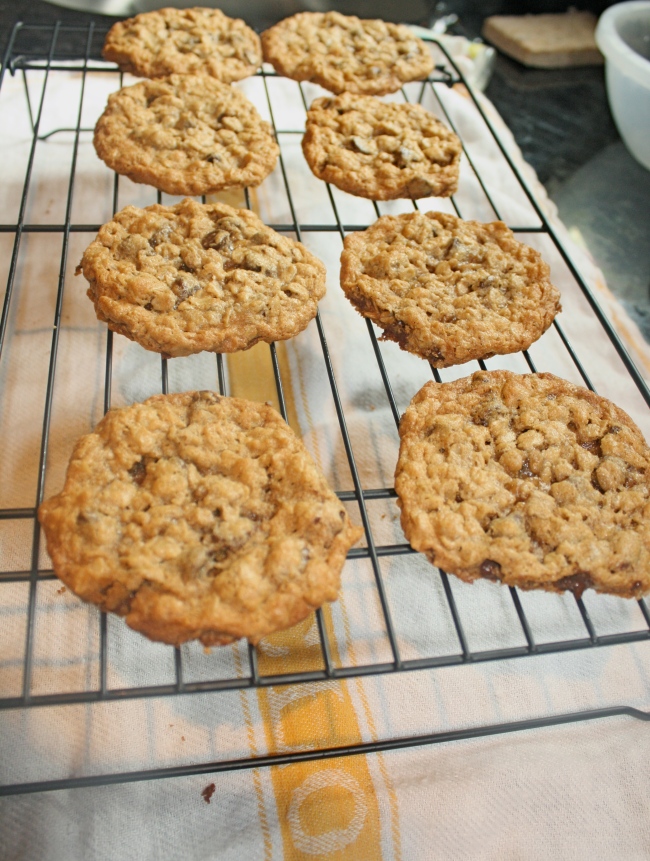
Allow the cookies to cool for several minutes on the pan and then transfer to a cooling rack to finish cooling.Image

Enjoy warm or a room temperature with a glass of milk.

Image

Gluten-free Chocolate Chip Oatmeal Cookies

Ingredients:
1 c butter

1 c white sugar

1 1/2 c packed light brown sugar

3 eggs

2 tsp vanilla extract

1 c creamy peanut butter

2 tsp baking soda

2 tsp hot water

4 1/2 c gluten-free oats

2 cups semi sweet chocolate chips

Directions:

Preheat oven to 350 degrees.  Cream together butter, peanut butter, white and brown sugars.  Add eggs, beating after each addition.  Mix in vanilla.  Stir together hot water and baking soda and then add to the batter.  Stir in oats and chocolate chips.  Refrigerate for at least one hour.  Spoon onto a greased cookie sheet and bake for 10-12 min until the edges are golden brown.  Allow to cool for 5 minutes on the cookie sheet and then transfer to a cooling rack.

Blueberry Crisp

Once upon a time my oldest daughter LOVED frozen blueberries.  She ate them like candy. So, my mother-in-law and I washed, sorted and froze 30 pounds (yes really, 30 pounds!!!) of organic blueberries.  And wouldn’t you know it, right about that time that my daughter decided she didn’t like them anymore.  This meant that 30 pounds of blueberries were relegated to my chest freezer where they have been hanging out for over a year.

Recently, my mother in law gave me this book by Shauna Niequist and I figured it had to be good because it was about food.  I didn’t make it very far before I wanted to try the blueberry crisp recipe recorded at the end of the first chapter.  You can imagine my excitement when I found a healthy, gluten free version of a blueberry crisp, which promised to use at least two of those 30 pounds of berries.

This crisp is rich and sweet enough for dessert, but virtuous enough to enjoy for breakfast.    Start with about 2 pounds of blueberries, almond meal, pecans, coconut oil, maple syrup and gluten free oats.Image

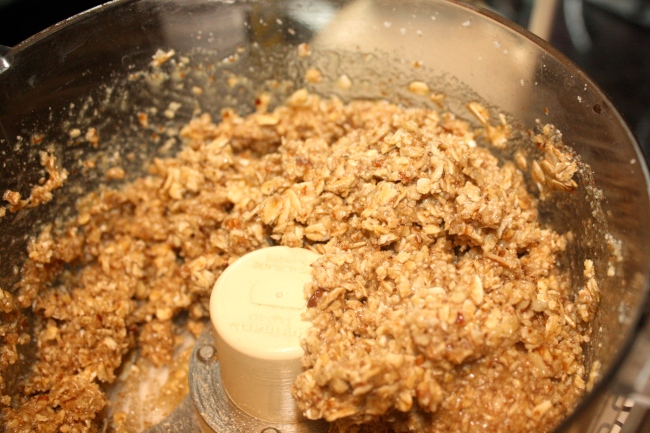
Pour the berries in an 8″ glass baking dish and then put all other ingredients in a food processor until everything is finely chopped and well combined.

Image

Spread the crisp topping over the blueberries and bake at 350 degrees for about 45 minutes or until the berries or bubbly and the crisp topping is golden brown.

Image

Enjoy warm or at room temperature, alone or with ice cream or yogurt.  Any way you slice it, it’s delicious!

Image

Blueberry Crisp (adapted from Bread and Wine by Shauna Niequist)

Ingredients

4 cups blueberries

1 cup gluten free oats

1/2 pecans

1/2 cup almond meal

1/4 cup maple syrup

1/4 c coconut oil

1/2 tsp salt

Directions:

Preheat oven to 350 degrees.  Pour blueberries into an 8″ pan.  Place all other ingredients in a food processor and pulse until finely chopped and well combined.  Spoon the topping over the blueberries and bake for 45 minutes or until the berries are bubbly and the crisp is golden brown.  Serve warm or at room temperature.

Vegan Espresso Fudgesicles

Ok, it’s really hot.  I can’t even stand to be outside unless there is a giant body of water available for me to immerse myself in.  When it’s this hot, I am all about finding recipes that require no cooking so I don’t have to make my house an inferno by turning on the oven.  My mom was coming over this week for dinner to celebrate her birthday and there was no way I was going to turn on the oven to bake a cake.  I found a recipe for espresso fudgesicles, that also happened to be vegan, and I felt like I’d pretty much hit the jackpot.   The only thing I had to do was track down those popsicle molds I bought a few years ago to make my picky little eater delicious and healthy yogurt/fruit popsicles (she, of course, thought they were gross, so the molds ended up in a drawer and my kids love playing with them and leaving them on the floor for me to step on).   Shockingly, I found all but one of the molds and I was all set to start on my journey to popsicle deliciousness.

These little gems did not disappoint.  Rarely do I find a healthy version of a classic that lives up to the original, but these were amazing.  Rich and creamy like the fudgesicles I remembered as a kid with a more grown up taste from the bittersweet chocolate and espresso.

Start with bittersweet chocolate, some ground up espresso powder and coconut milk.  Melt together over a double boiler until the chocolate is nearly melted.  Then stir in a pinch of salt and vanilla extract.

Image

Image

At this point,  you will want to let the mixture cool for a few minutes and then pour the mixture through a strainer to strain out the espresso grounds.  My husband actually likes the added crunch from the grounds so I skipped this step.  Next, pour the mixture into your molds.

Image

This step is key…you will want to freeze the popsicles overnight.  I tried to freeze them for 6 hours before dinner and we ended up eating them out of the molds with spoons.   I tried again in the morning and the popsicles came out much easier.    Just run the molds under warm water for a few seconds and pop them out.   Share them with your friends or eat them all yourself because they are just that good.

Image

Image


Vegan Espresso Fudgesicles

Ingredients:

6 oz bittersweet chocolate (you could use milk chocolate if you are making these for kids, but they won’t be vegan anymore)

1 14 oz can coconut milk

1 tbsp ground espresso (coarsely ground if you want to strain it out, finely ground if you want to keep it in.  You can also leave this out if you aren’t a fan of the mocha flavor.)

1/2 tsp vanilla

pinch of salt

Directions:

Melt chocolate, espresso and coconut milk in a double boiler until the chocolate is almost melted.  Add the vanilla and salt and allow the mixture to cool and the espresso to steep for 10 minutes.  Pour the mixture through a strainer if desired and then pour into popsicle molds.   Freeze the popsicles overnight and then enjoy!

Caramelized Peanut Butter Banana Ice Cream

My children are obsessed with ice cream…I mean OBSESSED.  They would eat it three times a day if I let them.  My husband blames this slight “problem” on me and between you and me, he’s probably right.  I saw this recipe on Roost Blog and jumped at the chance to potentially fool my children with an ice cream made out of bananas, very little sugar and protein-packed peanut butter.

Let’s be honest….calling this ice cream is a bit of a misnomer.  My husband compared it more to a frozen cookie dough consistency.  It is rich and decadent and best enjoyed in small portions.

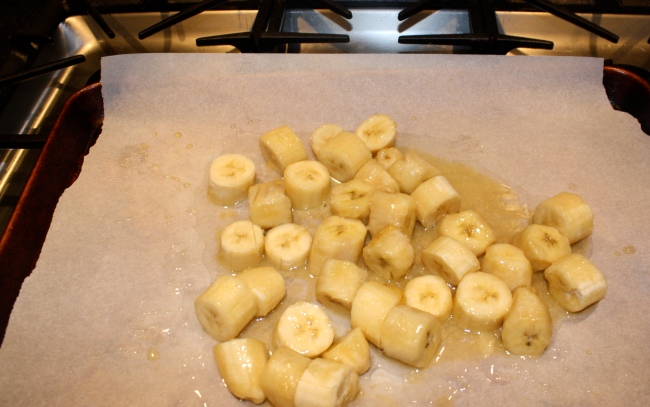
You want to start with very ripe bananas.  The riper the better.  Mine were not as ripe as they should have been, but I was just working with what I had.  Slice the bananas and then toss them in a mixture of honey (or agave for the vegan) and melted coconut oil.  Spread them out over a piece of parchment paper and roast at 350 for about 30 minutes.

Image

After 30 minutes, the bananas will be caramelized and fragrant (reminded me of banana bread).

Image

While the bananas are still warm, pour the bananas and all of their juices into a glass bowl and add 1/2 cup smooth peanut butter.  Blend the mixture together with an emersion blender until very smooth.

Image

Pour the mixture into a container and put in the fridge for 20 minutes.

Image

At this point your ice cream is technically done, but I felt it was absolutely crucial to add some dairy free mini chocolate chips.   You can skip this step if you are aren’t a chocolate lover (do those even exist?) and just keep the ice cream in the freezer for another several hours.  If you choose to add the the chips, take the ice cream out of the freezer after about 20 minutes or when the ice cream is just cool enough not to melt all the chips.  Gently fold in about 1/2 cup chocolate chips.  Return to the freezer for several more hours.

Image

Use an ice cream scoop that has been dipped in warm water to scoop the ice cream and enjoy!

Image

Caramelized Peanut Butter Banana Ice Cream

Ingredients:

8 very ripe bananas

6 tbsp honey

3 tbsp melted coconut oil

1/2 cup smooth peanut butter

1/2 cup dairy free chocolate chips (optional)

Directions:

Preheat the oven to 350 degrees. Slice the bananas and put them on a cookie sheet lined with parchment paper.  Mix the honey and melted coconut oil and pour over the bananas.  Toss gently to coat.  Roast the bananas for 30 minutes until fragrant and caramelized.  Pour the warm bananas in a bowl and add 1/2 cup peanut butter.  Blend with an emersion blender until very smooth.  Place in the freezer for at least three hours or overnight and stir in the chocolate chips after 20 minutes if desired.

Fallen Chocolate Cake

We don’t eat too many desserts at our house, but every once in awhile, a special occasion calls for a sweet treat.  We were at my parent’s lake house this weekend and I got put on dessert duty for our Father’s Day meal.  Most of my extended family eats gluten free so when I found this recipe on Heather Christo’s website, I knew I had to try it.  Not only is it gluten free, but it also has absolutely no flour!  I was a little skeptical the first time I tried it, but it is truly amazing.   It is not dense like a traditional flourless chocolate cake, but it still has an intense rich chocolate flavor.  It has a wonderful texture and most people that have tried it can hardly believe there is no flour in the recipe.

Image

Image

This cake batter comes together pretty quickly and has three basic components.  The first is a mixture of chocolate, butter and oil that is melted over a double boiler.  The second is a mixture of egg yolks, cocoa powder, coconut, salt and vanilla that is then stirred into the chocolate mixture.   Lastly, a mixture of egg whites and sugar are beaten until they reach stiff peaks.  They should look something like this.

Image

The egg whites are then gently folded into the chocolate, egg yolk mixture.Image

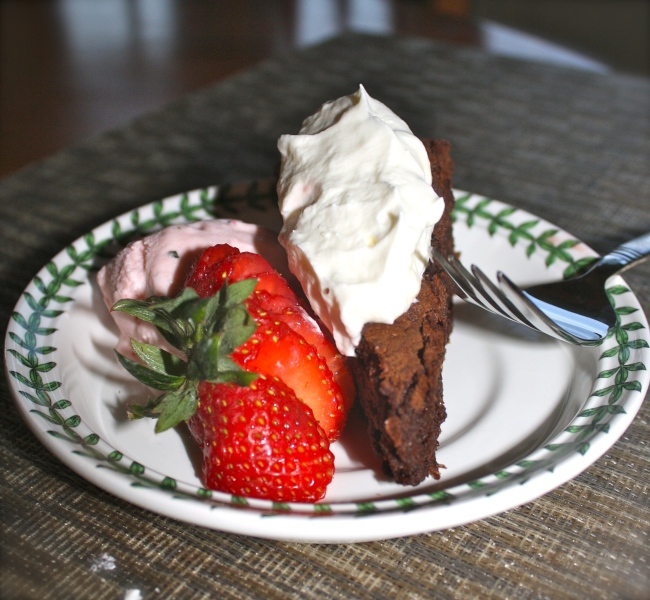
The cake bakes at 350 degrees for about 30 minutes and can either be served warm or at room temperature.   Both ways are equally delicious.  We ate it over the weekend with fresh whipped cream and homemade strawberry ice cream and everyone raved about it.  Who needs flour anyways?

ImageImage

Fallen Chocolate Cake

Ingredients:

1 stick of butter

12 oz dark chocolate pieces (I used 72% dark chocolate)

3 tbsp vegetable oil

6 eggs

2 tbsp cocoa powder (I used Hershey’s Special Dark)

2 tsp vanilla

1 tsp salt

3/4 cups sugar

1 1/2 cups shredded unsweetened coconut (note: if you had a strong aversion to coconut, you could actually leave this out, but the you can hardly taste the coconut and it gives the cake a bit more body)

Directions:

Preheat the oven to 350 degrees.  Grease a 10″ springform pan and coat with 1/4 cup of the sugar.  Melt the chocolate, butter and vegetable oil over a double boiler until almost melted and then remove from the heat.  Allow everything to finish melting, stirring until smooth.

While the chocolate cools slightly, separate the 6 eggs into two separate bowls.   Mix the cocoa, vanilla, coconut and salt in with the yolks and then stir it into the chocolate mixture.

Whip the 6 egg whites and remaining 1/2 cup sugar in a bowl until they have formed stiff peaks and then gently fold them in three batches into the chocolate, egg yolk mixture.

Pour the batter into the prepared pan and bake for 35 minutes.  Allow the cake to cool for 30 minutes and then remove it from the pan.  The cake can be served warm or at room temperature with fresh whipped cream or ice cream.