Vegan Espresso Fudgesicles

Ok, it’s really hot.  I can’t even stand to be outside unless there is a giant body of water available for me to immerse myself in.  When it’s this hot, I am all about finding recipes that require no cooking so I don’t have to make my house an inferno by turning on the oven.  My mom was coming over this week for dinner to celebrate her birthday and there was no way I was going to turn on the oven to bake a cake.  I found a recipe for espresso fudgesicles, that also happened to be vegan, and I felt like I’d pretty much hit the jackpot.   The only thing I had to do was track down those popsicle molds I bought a few years ago to make my picky little eater delicious and healthy yogurt/fruit popsicles (she, of course, thought they were gross, so the molds ended up in a drawer and my kids love playing with them and leaving them on the floor for me to step on).   Shockingly, I found all but one of the molds and I was all set to start on my journey to popsicle deliciousness.

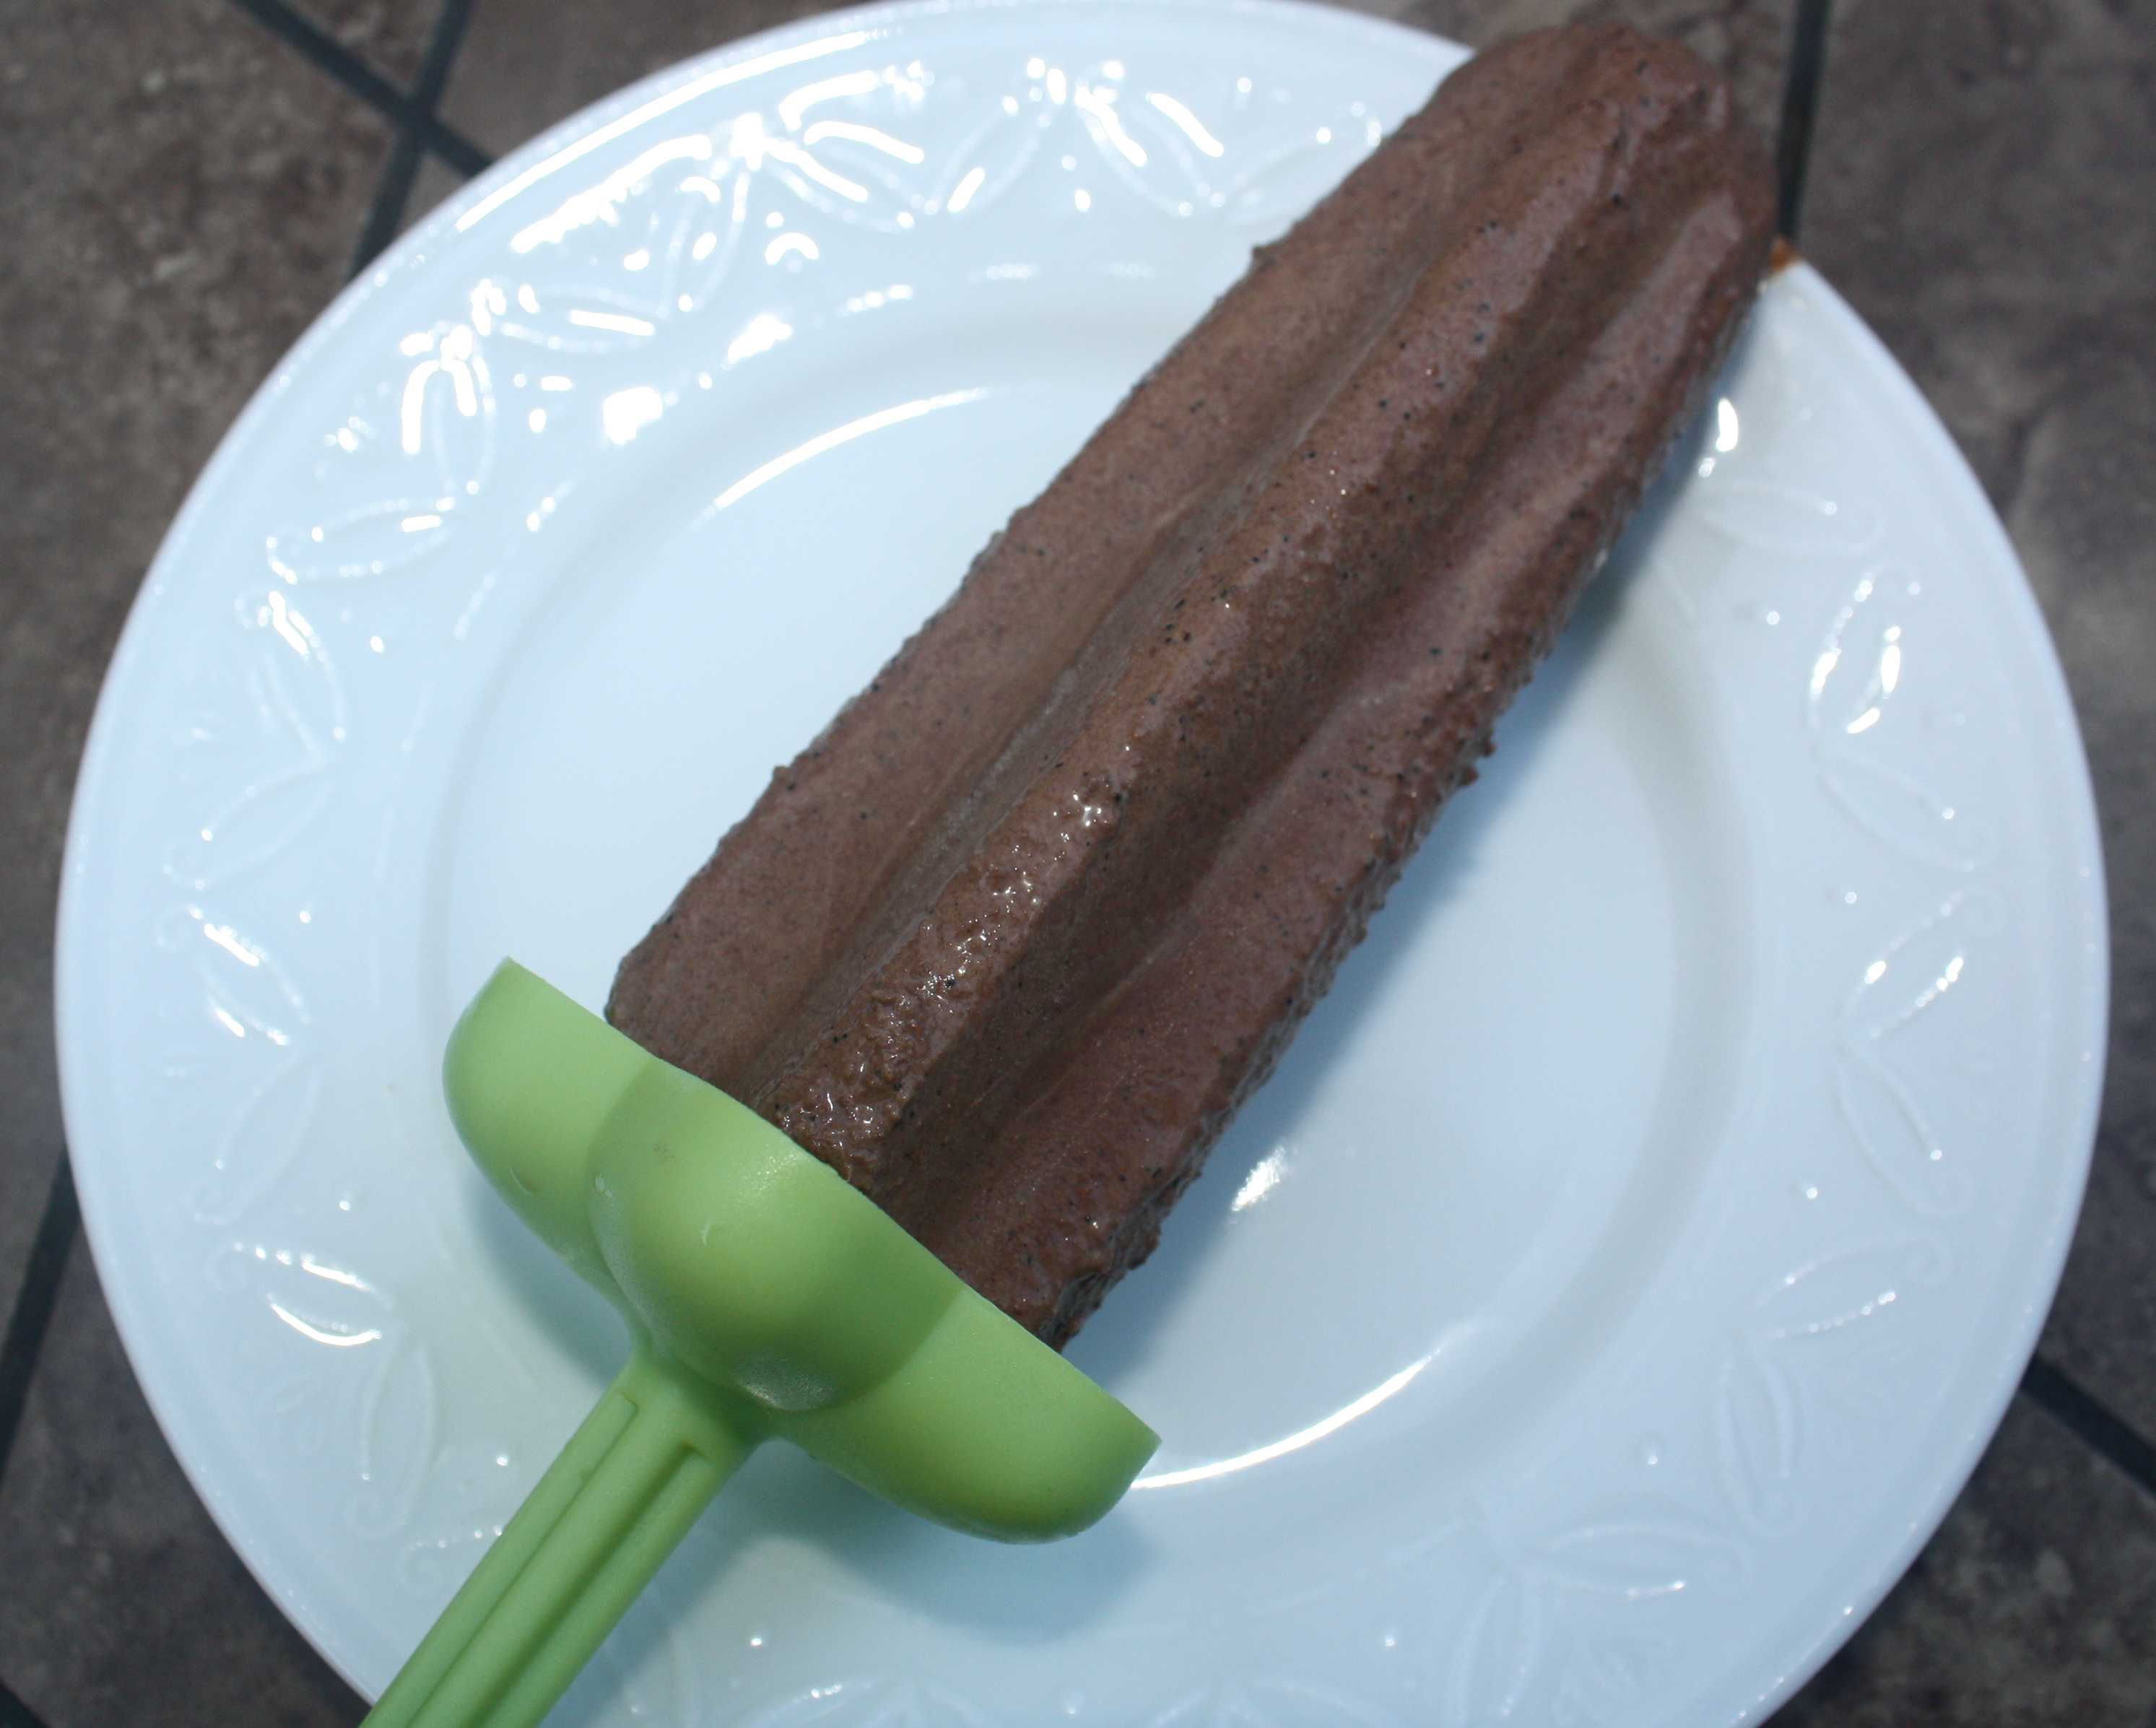
These little gems did not disappoint.  Rarely do I find a healthy version of a classic that lives up to the original, but these were amazing.  Rich and creamy like the fudgesicles I remembered as a kid with a more grown up taste from the bittersweet chocolate and espresso.

Start with bittersweet chocolate, some ground up espresso powder and coconut milk.  Melt together over a double boiler until the chocolate is nearly melted.  Then stir in a pinch of salt and vanilla extract.

Image

Image

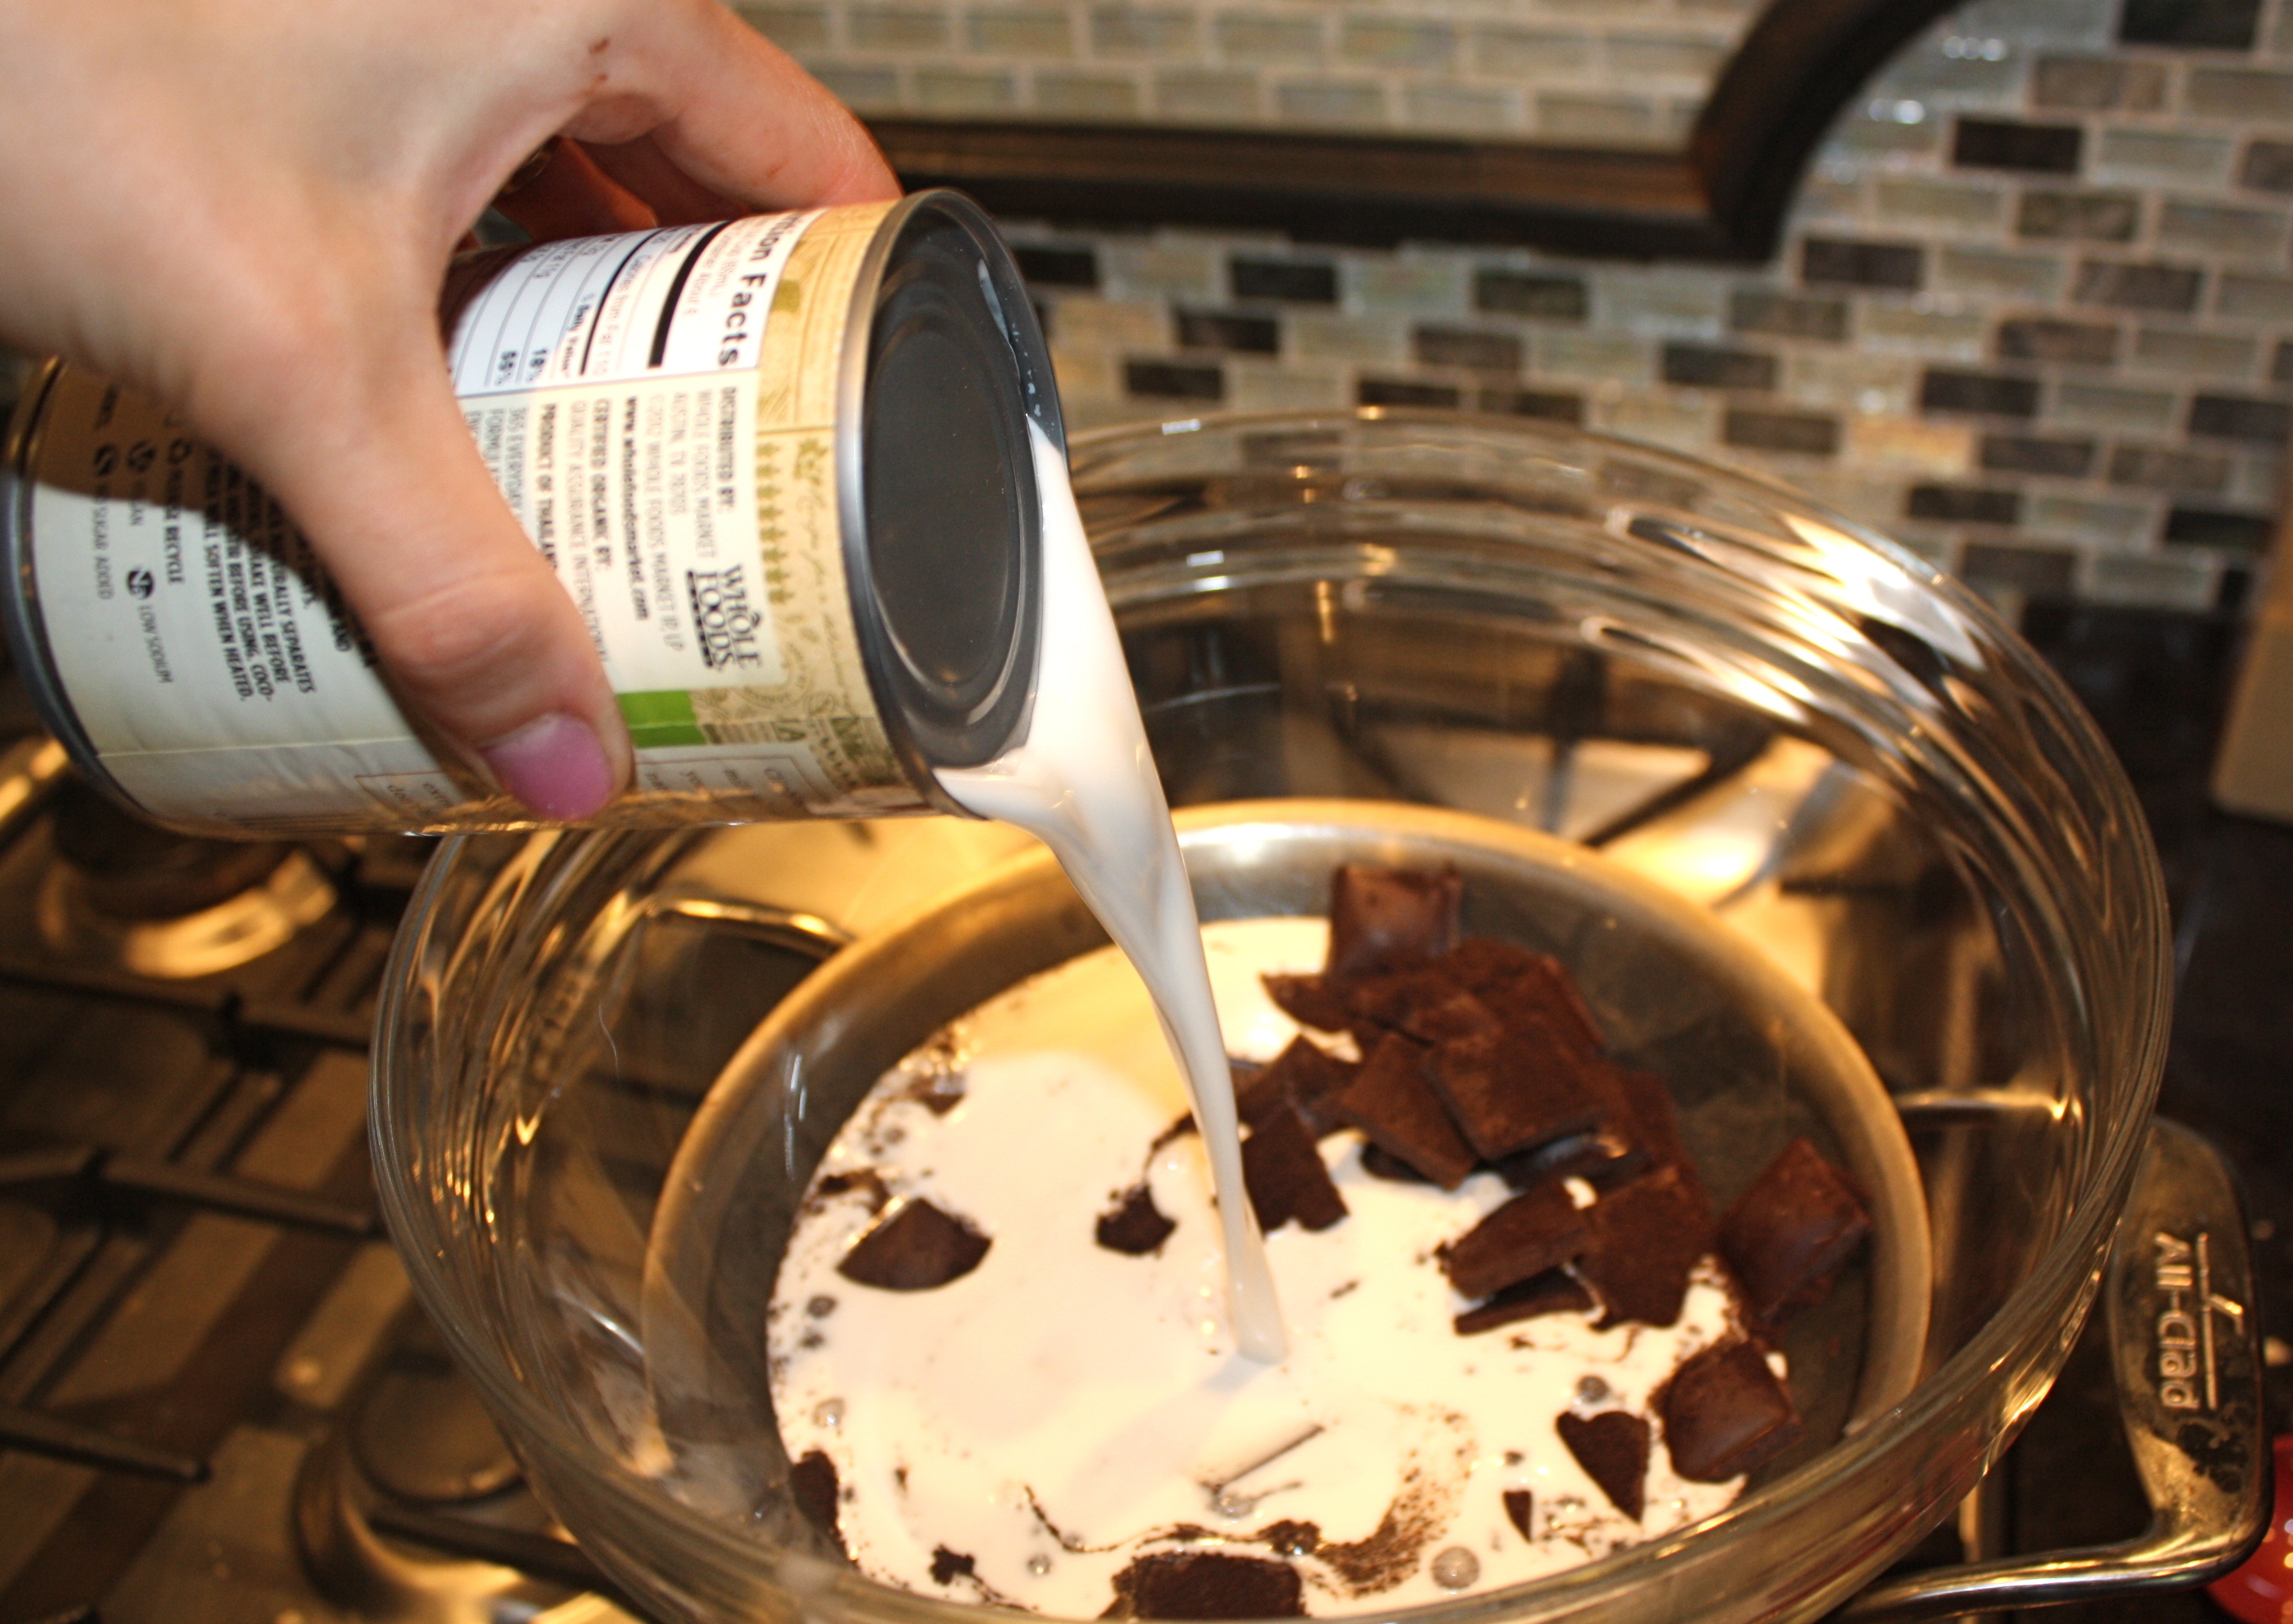
At this point,  you will want to let the mixture cool for a few minutes and then pour the mixture through a strainer to strain out the espresso grounds.  My husband actually likes the added crunch from the grounds so I skipped this step.  Next, pour the mixture into your molds.

Image

This step is key…you will want to freeze the popsicles overnight.  I tried to freeze them for 6 hours before dinner and we ended up eating them out of the molds with spoons.   I tried again in the morning and the popsicles came out much easier.    Just run the molds under warm water for a few seconds and pop them out.   Share them with your friends or eat them all yourself because they are just that good.

Image

Image


Vegan Espresso Fudgesicles

Ingredients:

6 oz bittersweet chocolate (you could use milk chocolate if you are making these for kids, but they won’t be vegan anymore)

1 14 oz can coconut milk

1 tbsp ground espresso (coarsely ground if you want to strain it out, finely ground if you want to keep it in.  You can also leave this out if you aren’t a fan of the mocha flavor.)

1/2 tsp vanilla

pinch of salt

Directions:

Melt chocolate, espresso and coconut milk in a double boiler until the chocolate is almost melted.  Add the vanilla and salt and allow the mixture to cool and the espresso to steep for 10 minutes.  Pour the mixture through a strainer if desired and then pour into popsicle molds.   Freeze the popsicles overnight and then enjoy!

Caramelized Peanut Butter Banana Ice Cream

My children are obsessed with ice cream…I mean OBSESSED.  They would eat it three times a day if I let them.  My husband blames this slight “problem” on me and between you and me, he’s probably right.  I saw this recipe on Roost Blog and jumped at the chance to potentially fool my children with an ice cream made out of bananas, very little sugar and protein-packed peanut butter.

Let’s be honest….calling this ice cream is a bit of a misnomer.  My husband compared it more to a frozen cookie dough consistency.  It is rich and decadent and best enjoyed in small portions.

You want to start with very ripe bananas.  The riper the better.  Mine were not as ripe as they should have been, but I was just working with what I had.  Slice the bananas and then toss them in a mixture of honey (or agave for the vegan) and melted coconut oil.  Spread them out over a piece of parchment paper and roast at 350 for about 30 minutes.

Image

After 30 minutes, the bananas will be caramelized and fragrant (reminded me of banana bread).

Image

While the bananas are still warm, pour the bananas and all of their juices into a glass bowl and add 1/2 cup smooth peanut butter.  Blend the mixture together with an emersion blender until very smooth.

Image

Pour the mixture into a container and put in the fridge for 20 minutes.

Image

At this point your ice cream is technically done, but I felt it was absolutely crucial to add some dairy free mini chocolate chips.   You can skip this step if you are aren’t a chocolate lover (do those even exist?) and just keep the ice cream in the freezer for another several hours.  If you choose to add the the chips, take the ice cream out of the freezer after about 20 minutes or when the ice cream is just cool enough not to melt all the chips.  Gently fold in about 1/2 cup chocolate chips.  Return to the freezer for several more hours.

Image

Use an ice cream scoop that has been dipped in warm water to scoop the ice cream and enjoy!

Image

Caramelized Peanut Butter Banana Ice Cream

Ingredients:

8 very ripe bananas

6 tbsp honey

3 tbsp melted coconut oil

1/2 cup smooth peanut butter

1/2 cup dairy free chocolate chips (optional)

Directions:

Preheat the oven to 350 degrees. Slice the bananas and put them on a cookie sheet lined with parchment paper.  Mix the honey and melted coconut oil and pour over the bananas.  Toss gently to coat.  Roast the bananas for 30 minutes until fragrant and caramelized.  Pour the warm bananas in a bowl and add 1/2 cup peanut butter.  Blend with an emersion blender until very smooth.  Place in the freezer for at least three hours or overnight and stir in the chocolate chips after 20 minutes if desired.

Vegan and Gluten Free Pumpkin Bread

Today is a very special day because my little sis, Megan, will be joining us for today’s post.  She just got married so she has been experimenting in the kitchen with recipes that her hubs will love and that will accommodate her dietary restrictions.  She made this for us last weekend and I was so impressed that I asked her to remake it for the blog.  Enjoy!  

Who doesn’t love pumpkin bread every once in awhile!?  The problem: it is usually full of ingredients that are less than ideal for a health food enthusiast or those with dietary limitations.  There are not many recipes out there that can make up for all the sins in pumpkin bread, but I came across one from She Let Them Eat Cake that satisfies both a vegan and gluten free palate.  I was skeptical to try this recipe as I did not think it would be possible to replicate the “real thing”, but surprisingly it was incredibly delicious and my husband continues to ask me to make it, which, let’s be honest is the true test of any baked delicacy.  Let’s get started shall we?

Perhaps the most unfamiliar ingredient in the recipe is flaxseed meal. It intimidated me when I saw this ingredient listed as I thought it might be difficult to find, but I was surprised to find it on the shelves of most grocery stores.  In this recipe it is used as a “starter”.  Combined with warm water, it turns into a foamy paste that doubles as an egg substitute.  Vegans rejoice!

Image

Once the “starter” is well, started, the rest of the recipe comes together just as any other bread or baked good might.  It is important to mix all wet and dry ingredients separately except for the sugar.  The sugar is combined with the flaxseed and water concoction until it forms a foamy paste. The rest of the wet ingredients are then combined with this flaxseed and sugar mixture.  You can use any type of gluten free baking flour, but I find that Pamela’s Baking and Pancake Mix works very well with this recipe.  It can be found in most grocery stores in the gluten free or baking aisles.

Image

Once your wet and dry ingredients are mixed separately, you simply combine the dry ingredients with the wet, a small amount at a time.  It is important not to over mix the batter; just mix until combined.  This would be a good time to add a cup of GF, dairy free chocolate for you vegans out there, or of course regular chocolate works just fine for those who are just GF.  Then simply pour, bake, and enjoy!

Image

Tips: Sprinkle sugar over the raw batter before baking.  It produces a crunchy, shimmery topping that looks beautiful and tastes delicious.  I find that the bread takes longer than suggested in the recipe to bake.  Bake for at least 40 minutes and then test with a knife every 5-10 minutes until the knife comes out clean.

Image

Image

 Vegan and Gluten Free Pumpkin Bread

Ingredients:

2.5 tbsp ground flax mixed with 3 tbsp warm water

¾ cup coconut sugar (or sugar of your choosing), plus more for sprinkling

1/3 cup plus 3 tbsp unsweetened applesauce

1 cup unsweetened pumpkin puree (not pumpkin pie filling)

1 tbsp vanilla extract

½ cup melted coconut oil, plus more for brushing

2 cup my all-purpose mix

2 tsp baking powder

1 tsp baking soda

2 tsp cinnamon

½ tsp sea salt

Directions:

Preheat the oven to 350 degrees. Lightly oil a 9×4 inch loaf pan.

Combine the flax-water mixture in a large bowl, set aside for a couple of minutes. Add the sugar and combine until the mixture is a little frothy. Add all of the applesauce, pumpkin puree, vanilla and oil and stir until combined.

Sift the flours, baking powder, baking soda, cinnamon and sea salt in a medium sized bowl. Add the wet mixture to the dry mixture and stir just until combined (now would be a good time to add 1 cup of chocolate chips or nuts if you like them in your pumpkin bread).

Put in oven and bake for 20 minutes. Remove from the oven and brush with some melted coconut oil. Bake for another 15-18 minutes – or until tested with a knife.

Simple Kale Salad

So…kale.  Loved by few, hated by many.   It’s one of those health foods that we choke down because it’s “good for us.”  Now, I’m one of those weird people who actually likes kale, but I realize that many people need alittle (or alot) of something extra to make it palatable.  A good friend of mine introduced me to this recipe and it’s my new favorite quick fix for a dinner side salad.

The real star of this salad is the walnut dressing you toss it in.  It’s quick and delicious and adds a nutty balance to the kale.   Give a couple of ingredients a quick whirl in a blender and its done.

Image

Image

While you could stop with the walnut dressing, the salad is really enhanced my a small drizzle of balsamic glaze.  It adds just the right amount of sweetness to make this salad even more delicious.  Try this salad and you may just change your mind about kale.

ImageImage

Simple Kale Salad

Ingredients

1 bunch of kale, washed and chopped

1 c walnuts

3 cloves garlic

1 tbsp tamari

1/4- 1/2 c water

store bought or homemade balsamic glaze

Directions:

Combine walnuts, garlic and tamari and add 1/4 c water.  Blend with a hand blender or machine blender until smooth.  If desired, add more water for a thinner texture.  Toss with the kale and serve with a drizzle of balsamic glaze.